I had the chance to test the DeltaRho 350 f/3 Astrograph (DR350) with the serial number 0003 – all in all this solution is absolutely remote capable! You can read my first impressions and experiences here:
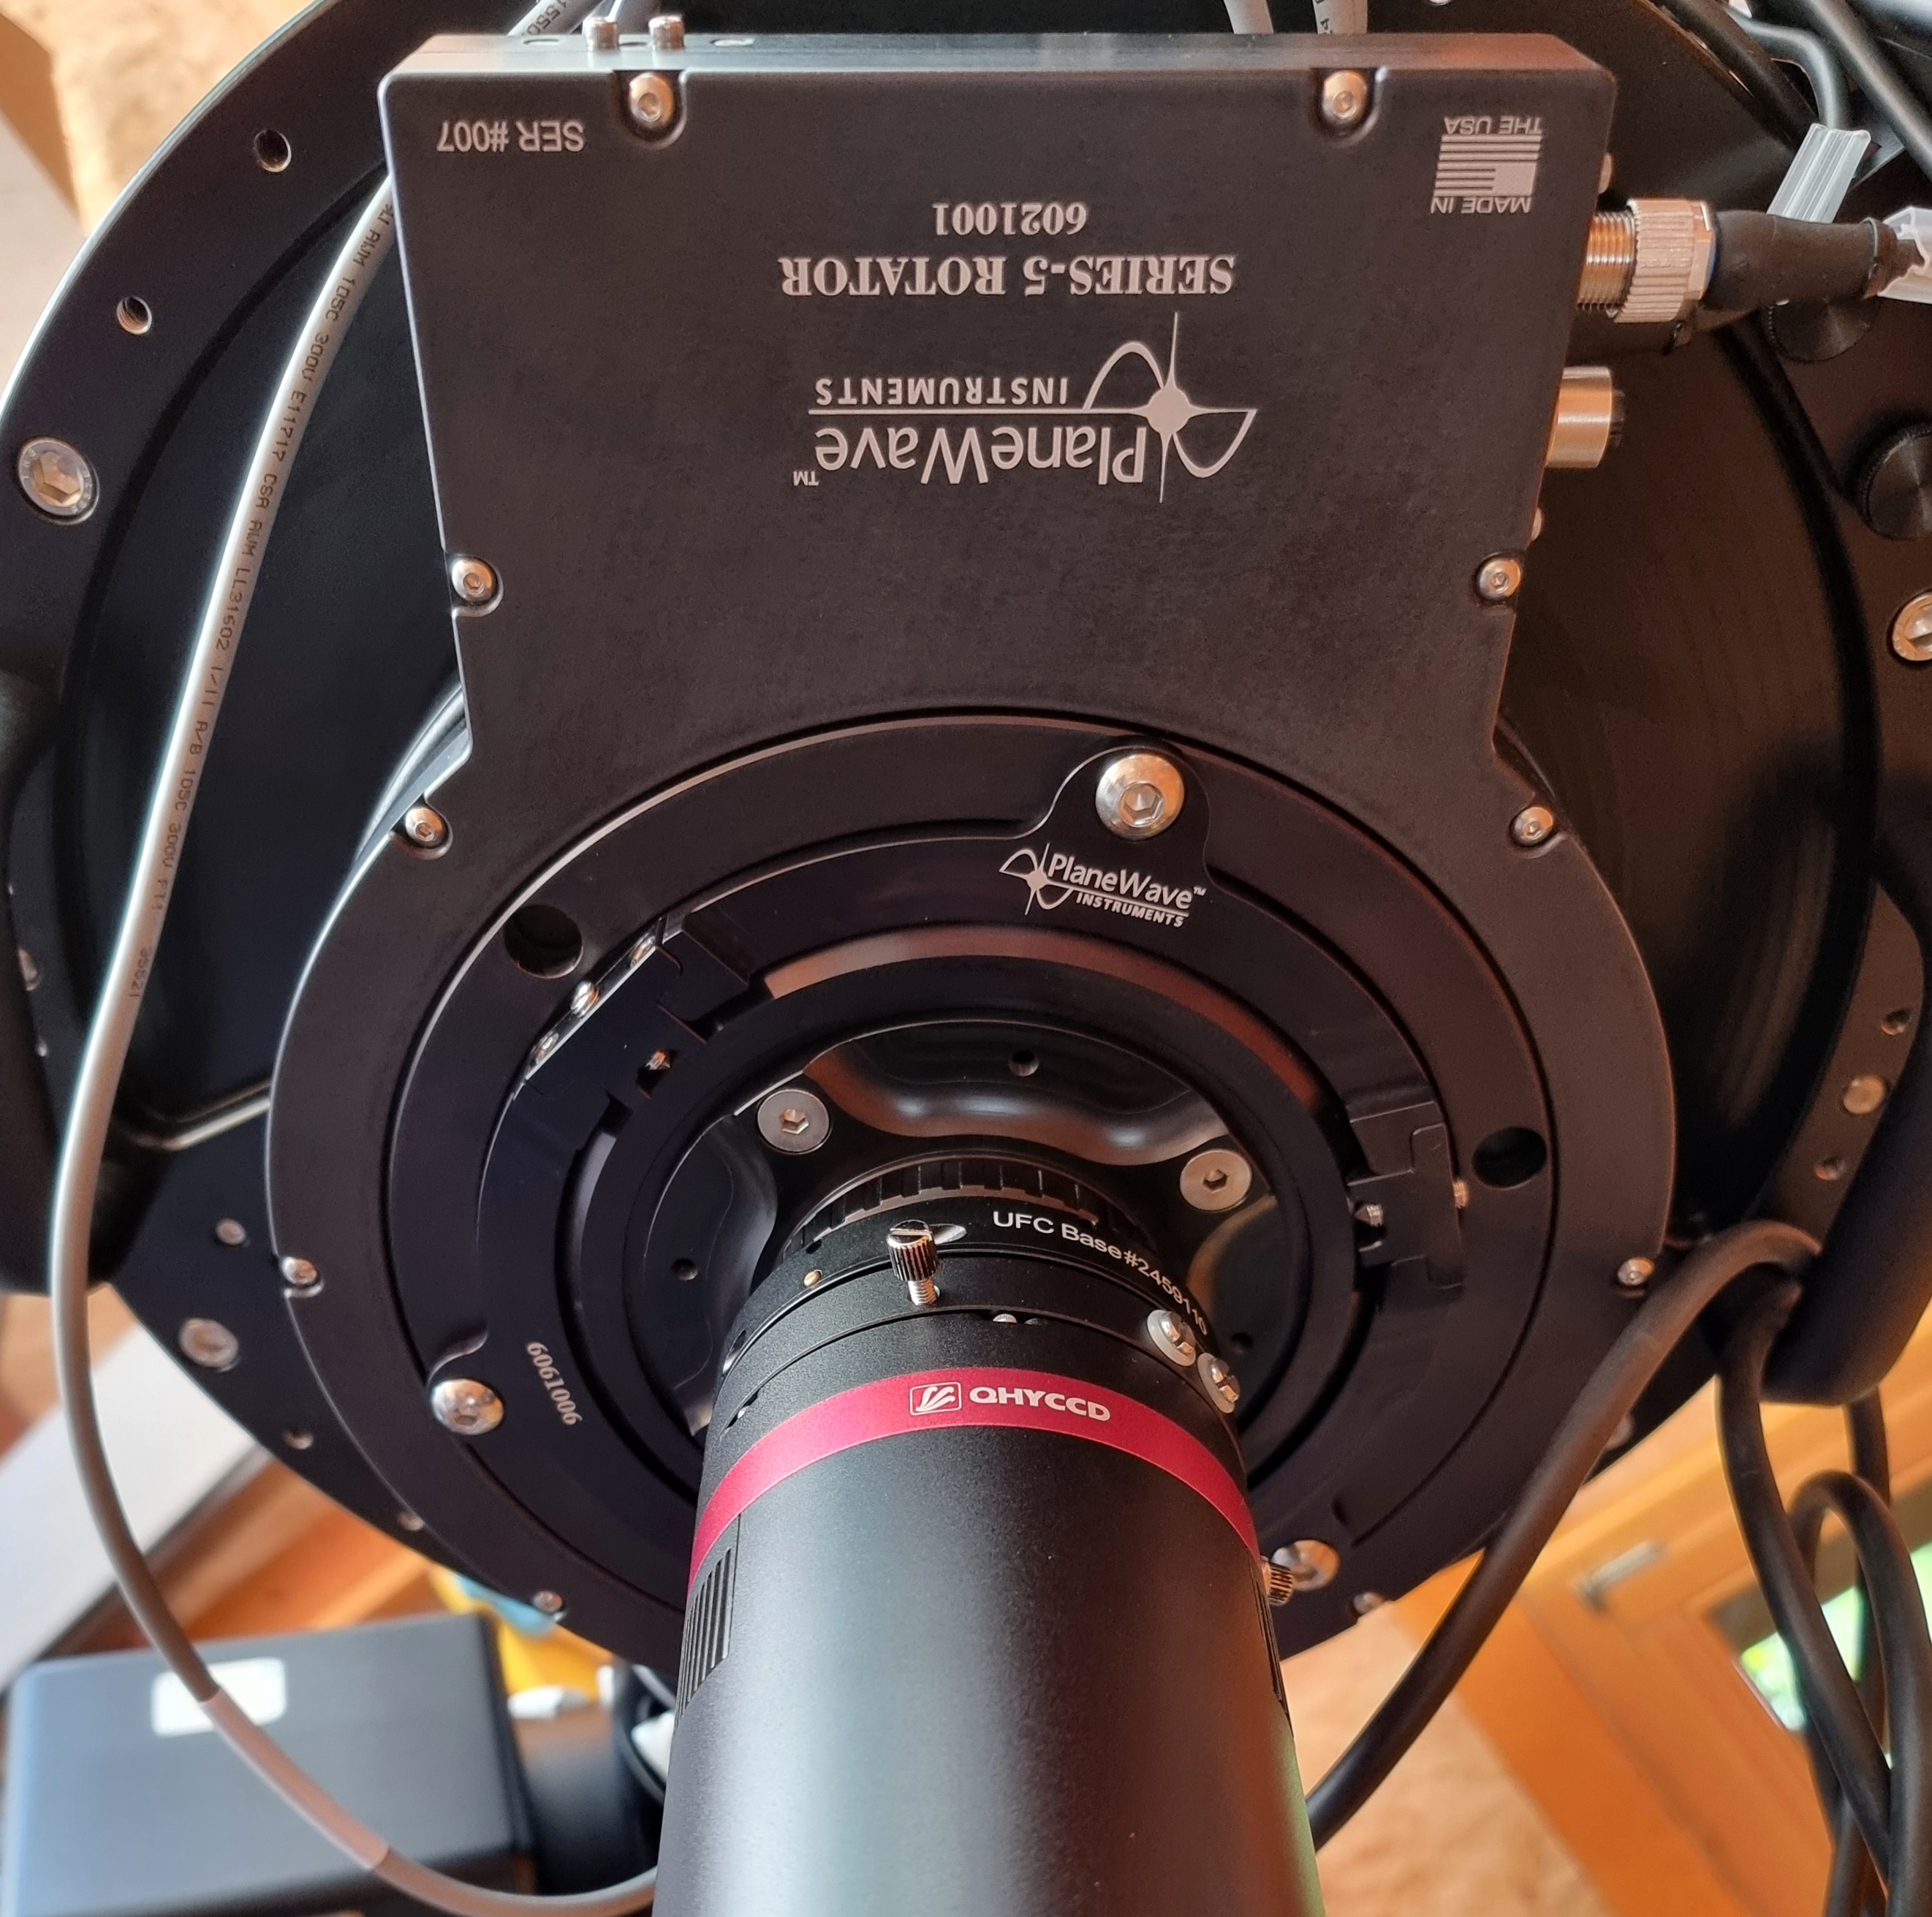
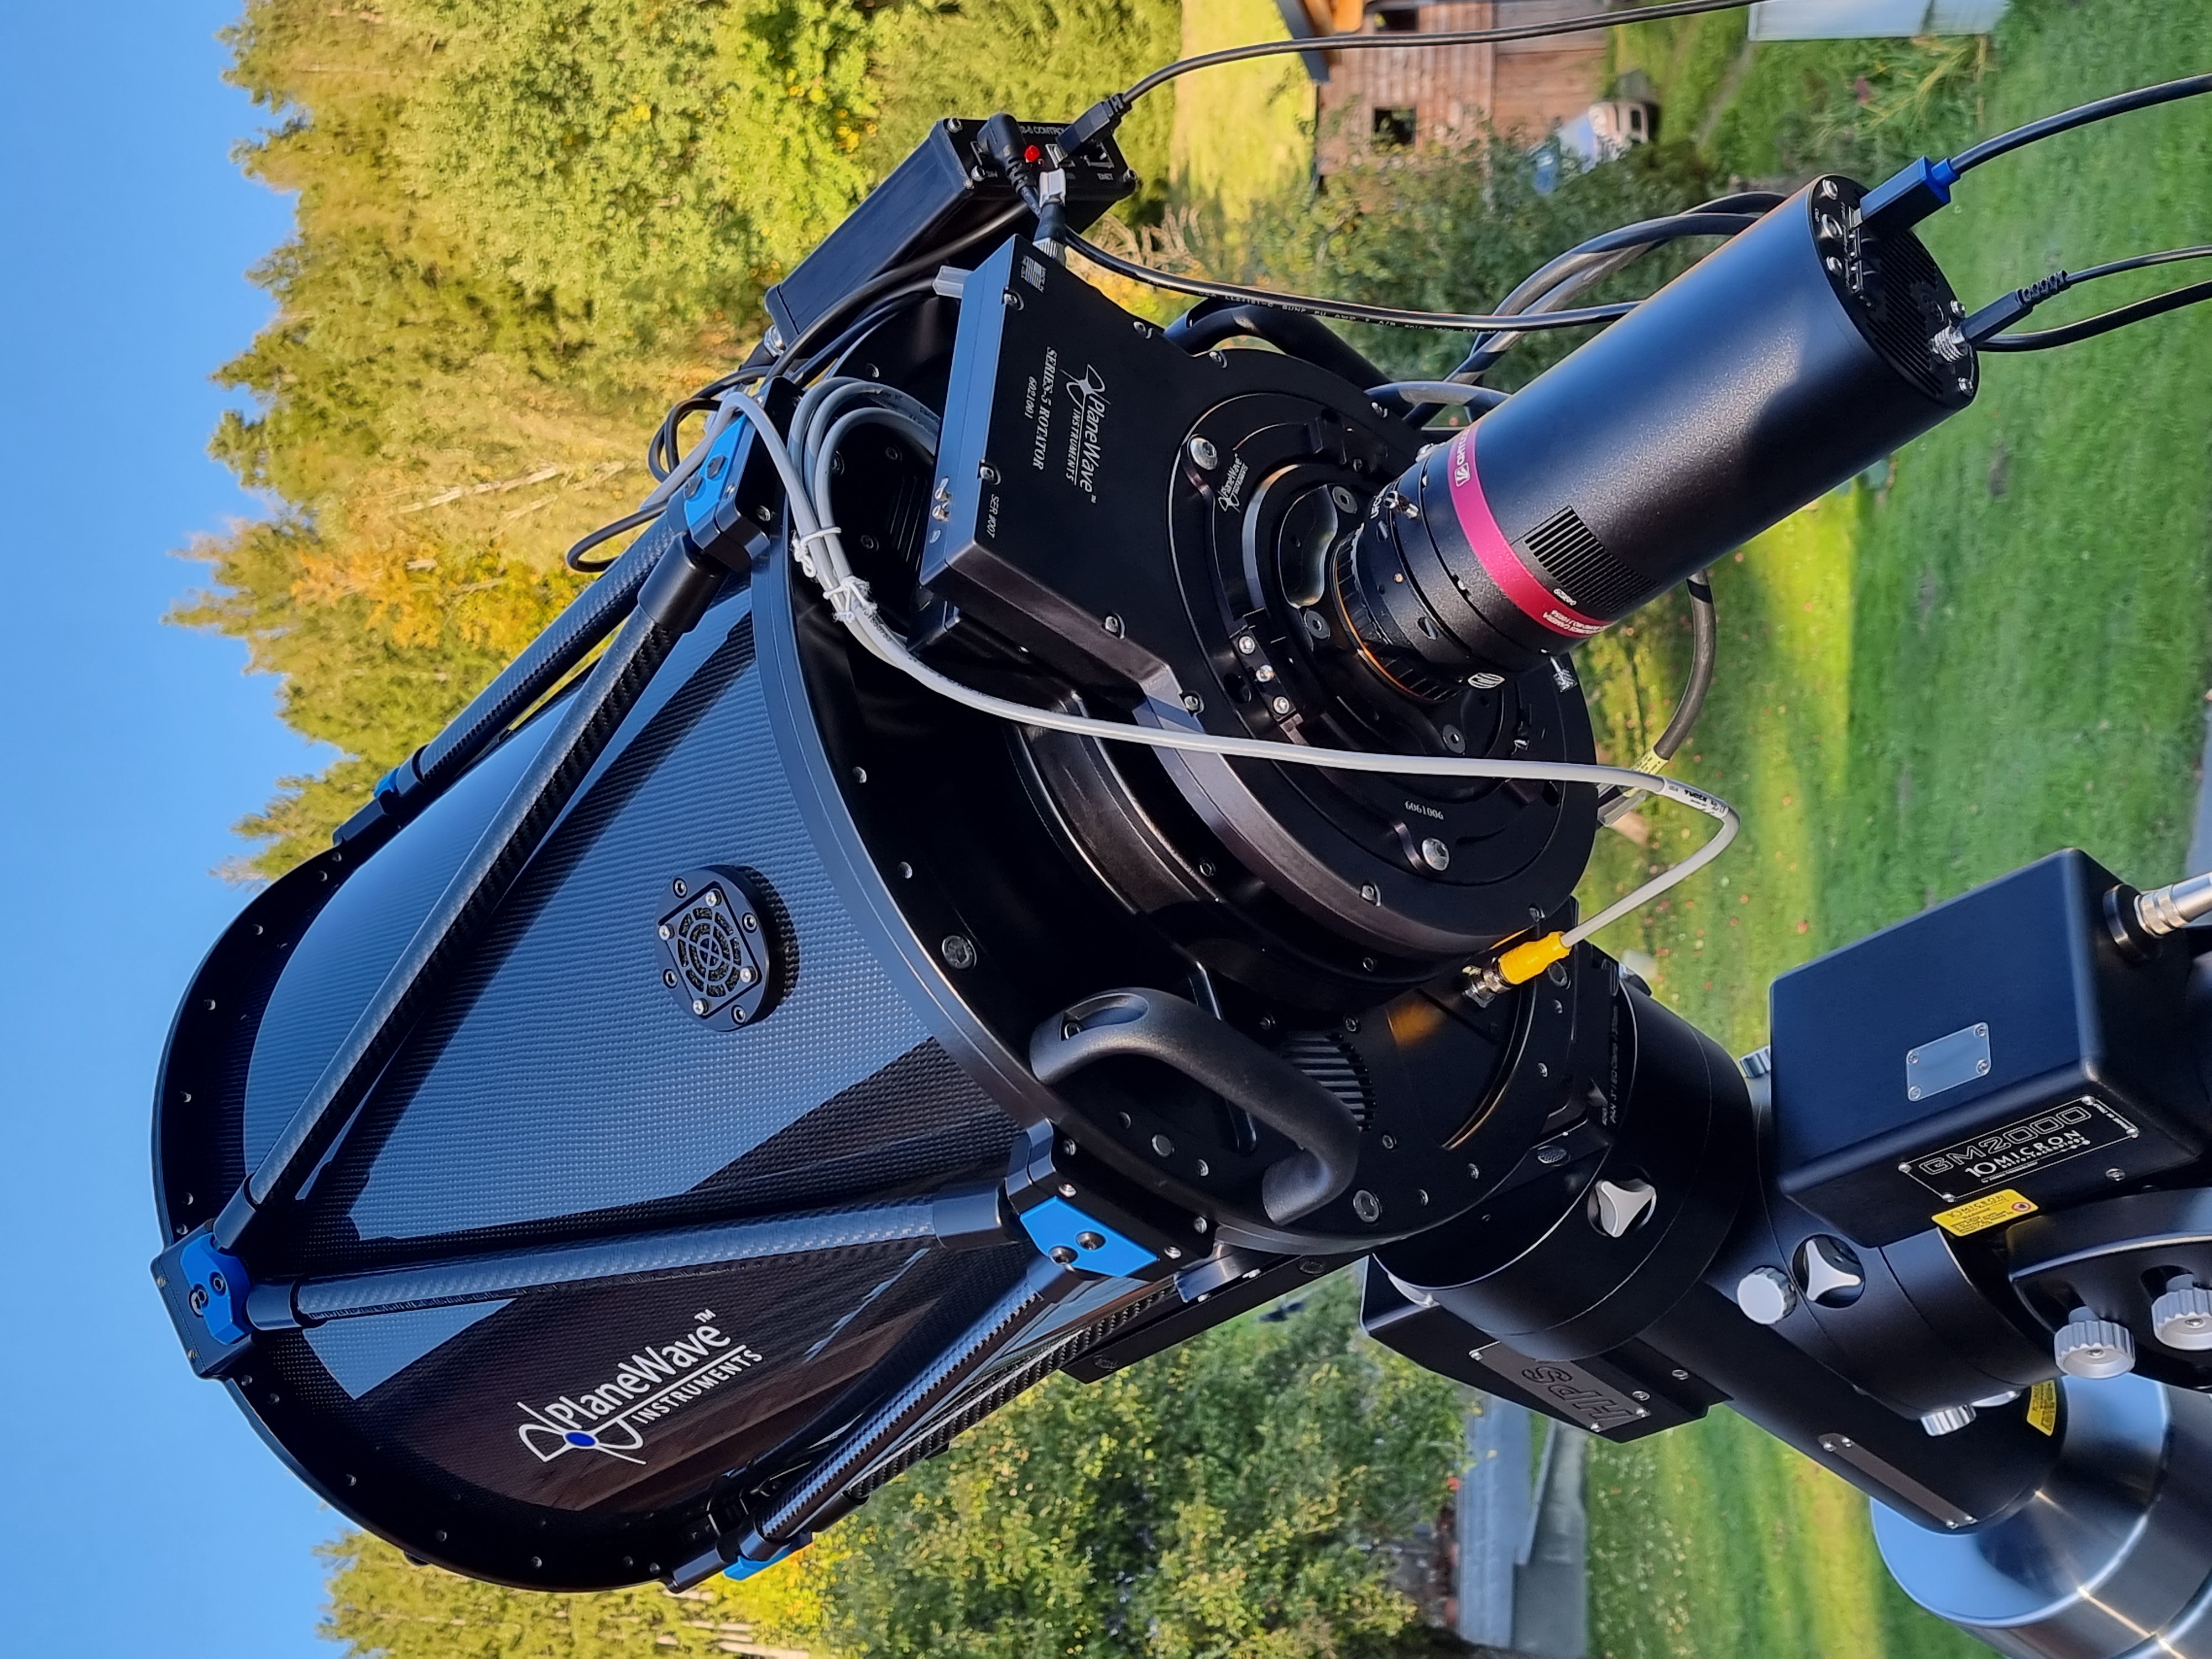
The unit is very well made and in combination with PlaneWave's focuser and de-rotator, it is quite a massive unit and surprisingly heavy. The center of gravity is at the back of the telescope.
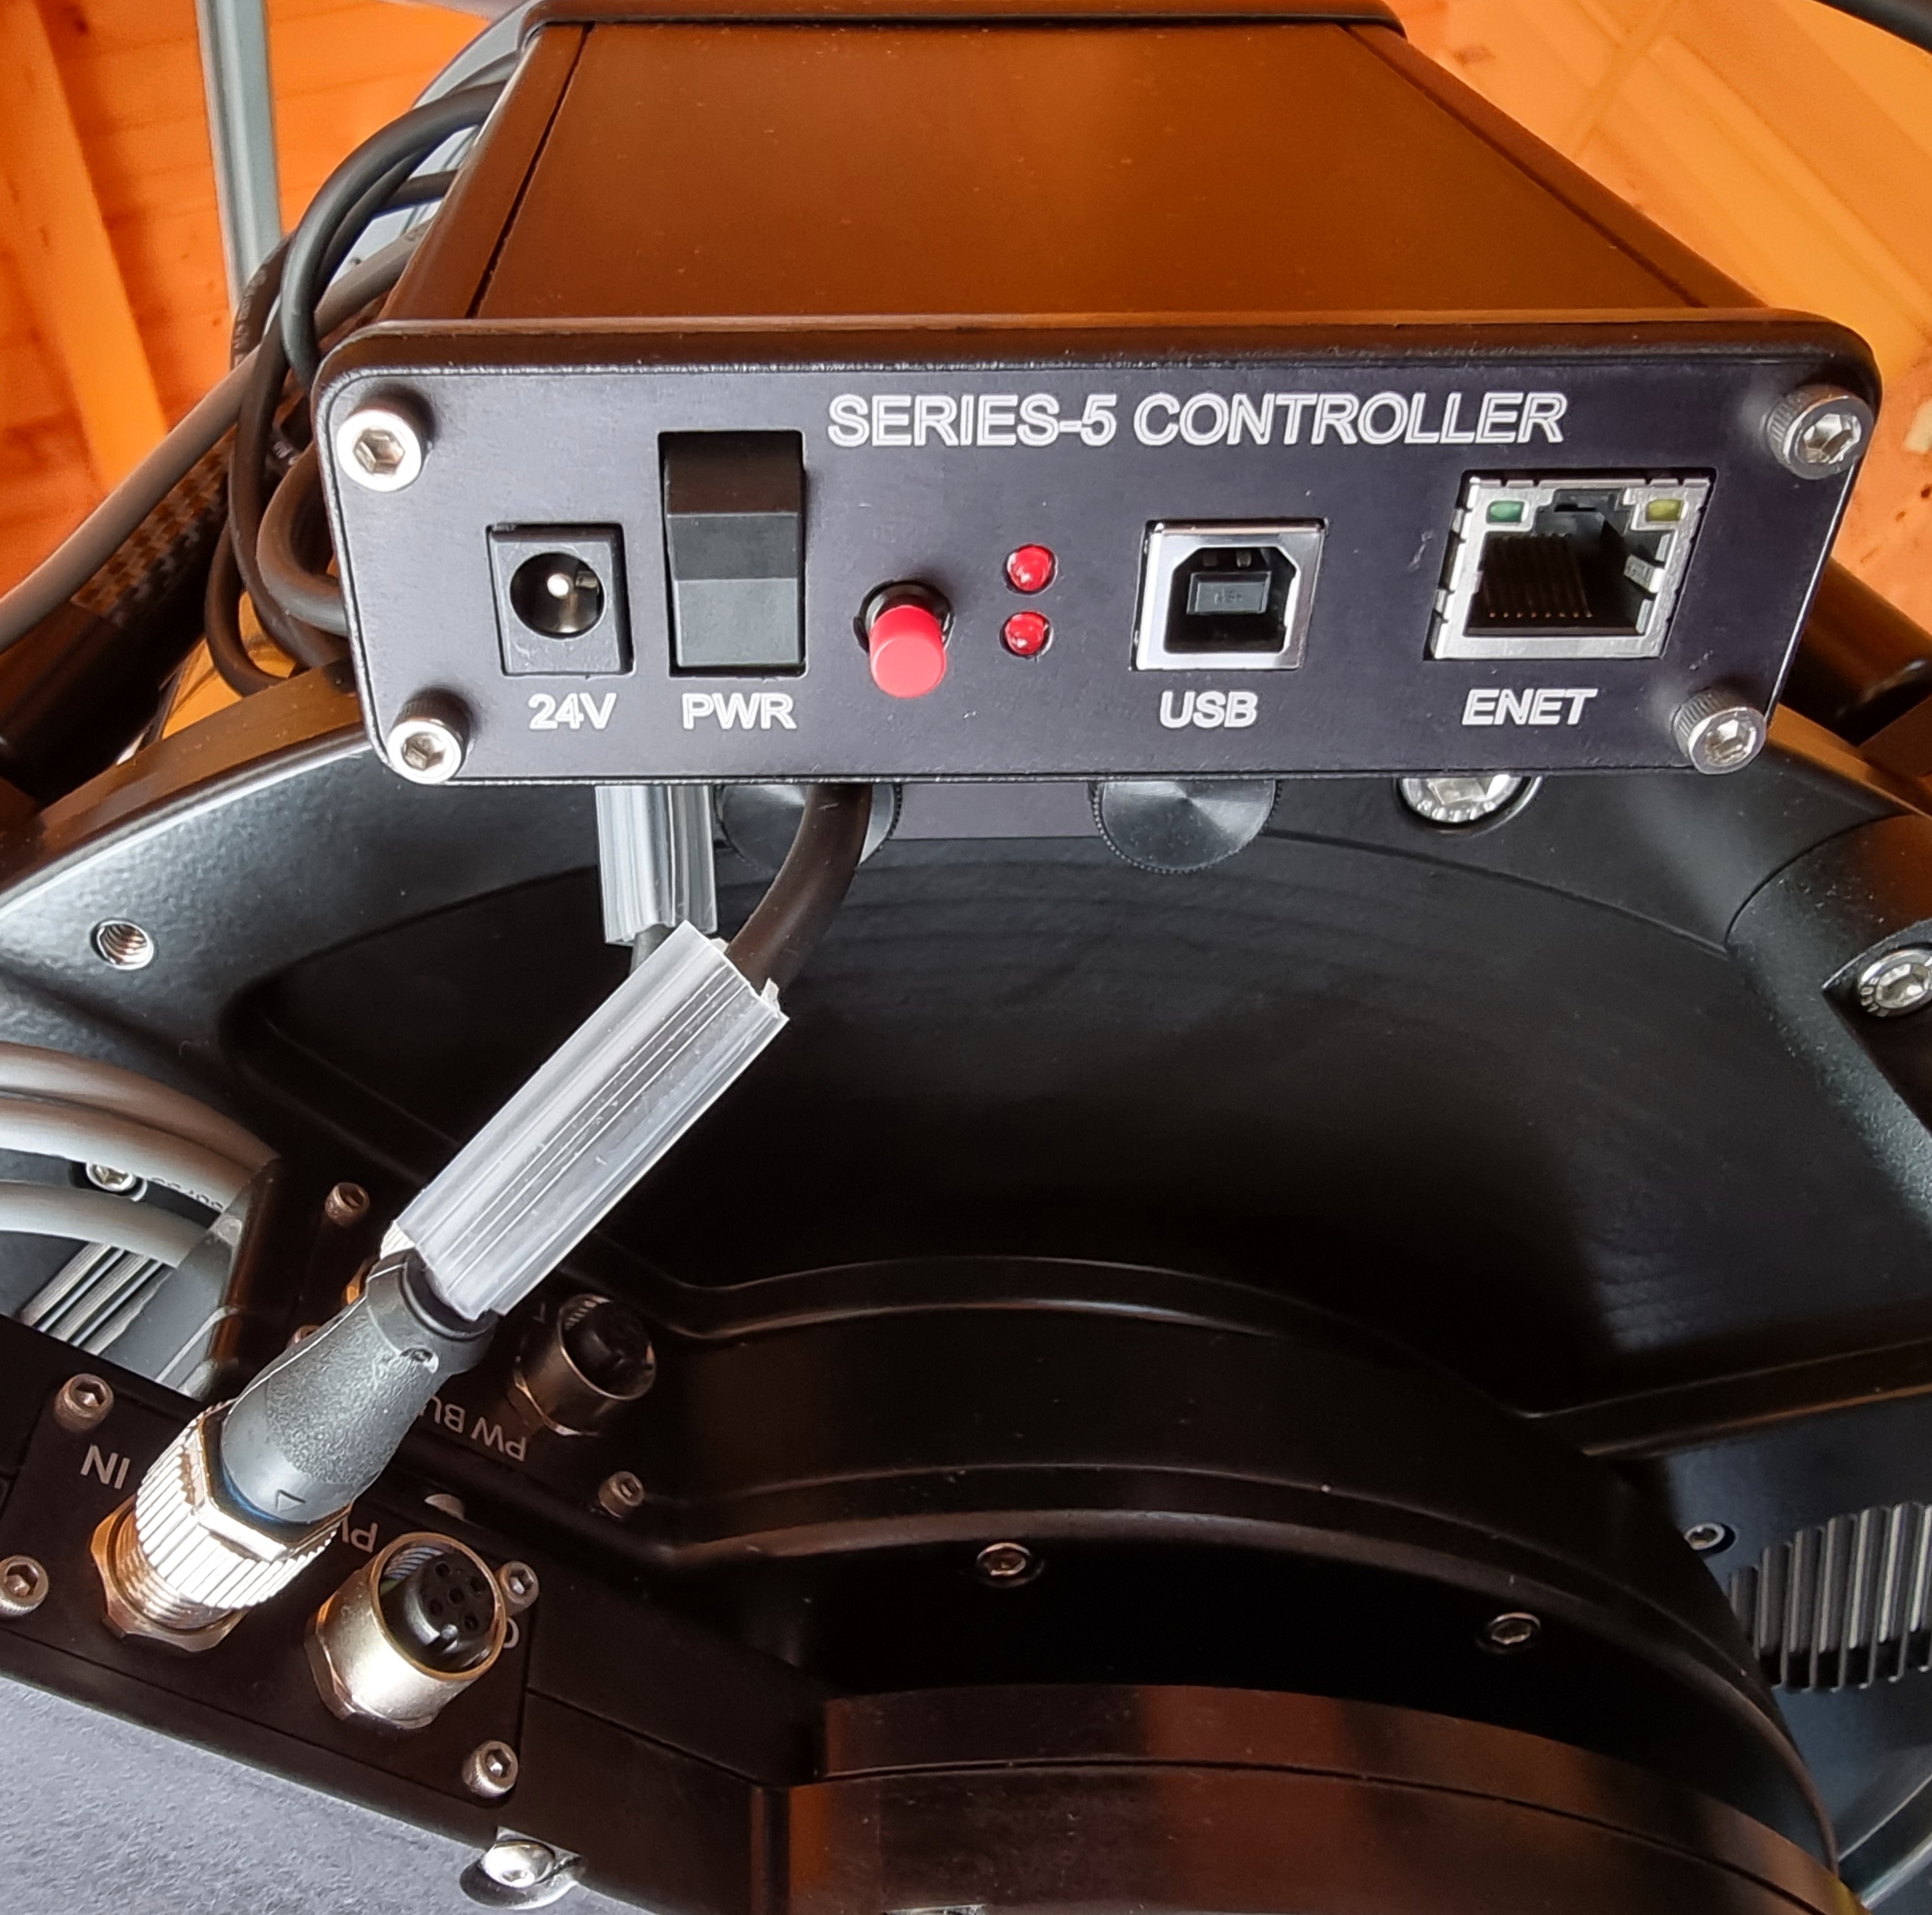
The PWI4 (beta) software that operates the DR350 telescope installs quickly and works immediately with Maxim DL. If you have problems, take a look at the USB settings in PWI4, which is used to operate the fans, the heating of the secondary and primary mirrors, the focuser, and the rotator. The DR350 is controlled purely by the software.
With Maxim DL, I have been able to perform every working routine of focusing and field tilt measurement very well. The results are consistent and extremely important for accurate alignment! After I attached the QHY 600M PH, BSI Cooled Cameras (#1931162) with the help of the Baader M68 system, the DR350 was ready for use.
There is a saying among astronomers that with a new hardware the weather is bad for many weeks... Now I have to give some credence to this, because due to high and ground fog, or clouds that did not have a gap, the process of adjustment dragged on for a long time... and the first result was still far away.
The bottom line is that the adjustment is easy to do - but it is very important that the image fits! The primary and secondary mirrors are laser-aligned at PlaneWave in the US; the secondary and the tilter must then bring the camera into optimal alignment.
TIP: The night must be good and clear for the field tilt measurement results to be correct! In case of haze, fog or clouds I advise against it!
Following are my steps in an overview to get the DR350 to work.
Once I had achieved the values that Planewave specifies, imaging began!

I shot in luminance and with RGB (the new Baader LRGB CMOS optimized filter are just top!). I compared the focus in Lum with R/G/B, again the system is very balanced, there is not much variation in the values.
Now I just had to have a really good night with no moon (not a good combination at f/3), and good to very good conditions. Often there was good weather until the end of twilight, but then very often it became difficult. (Fog formation!)
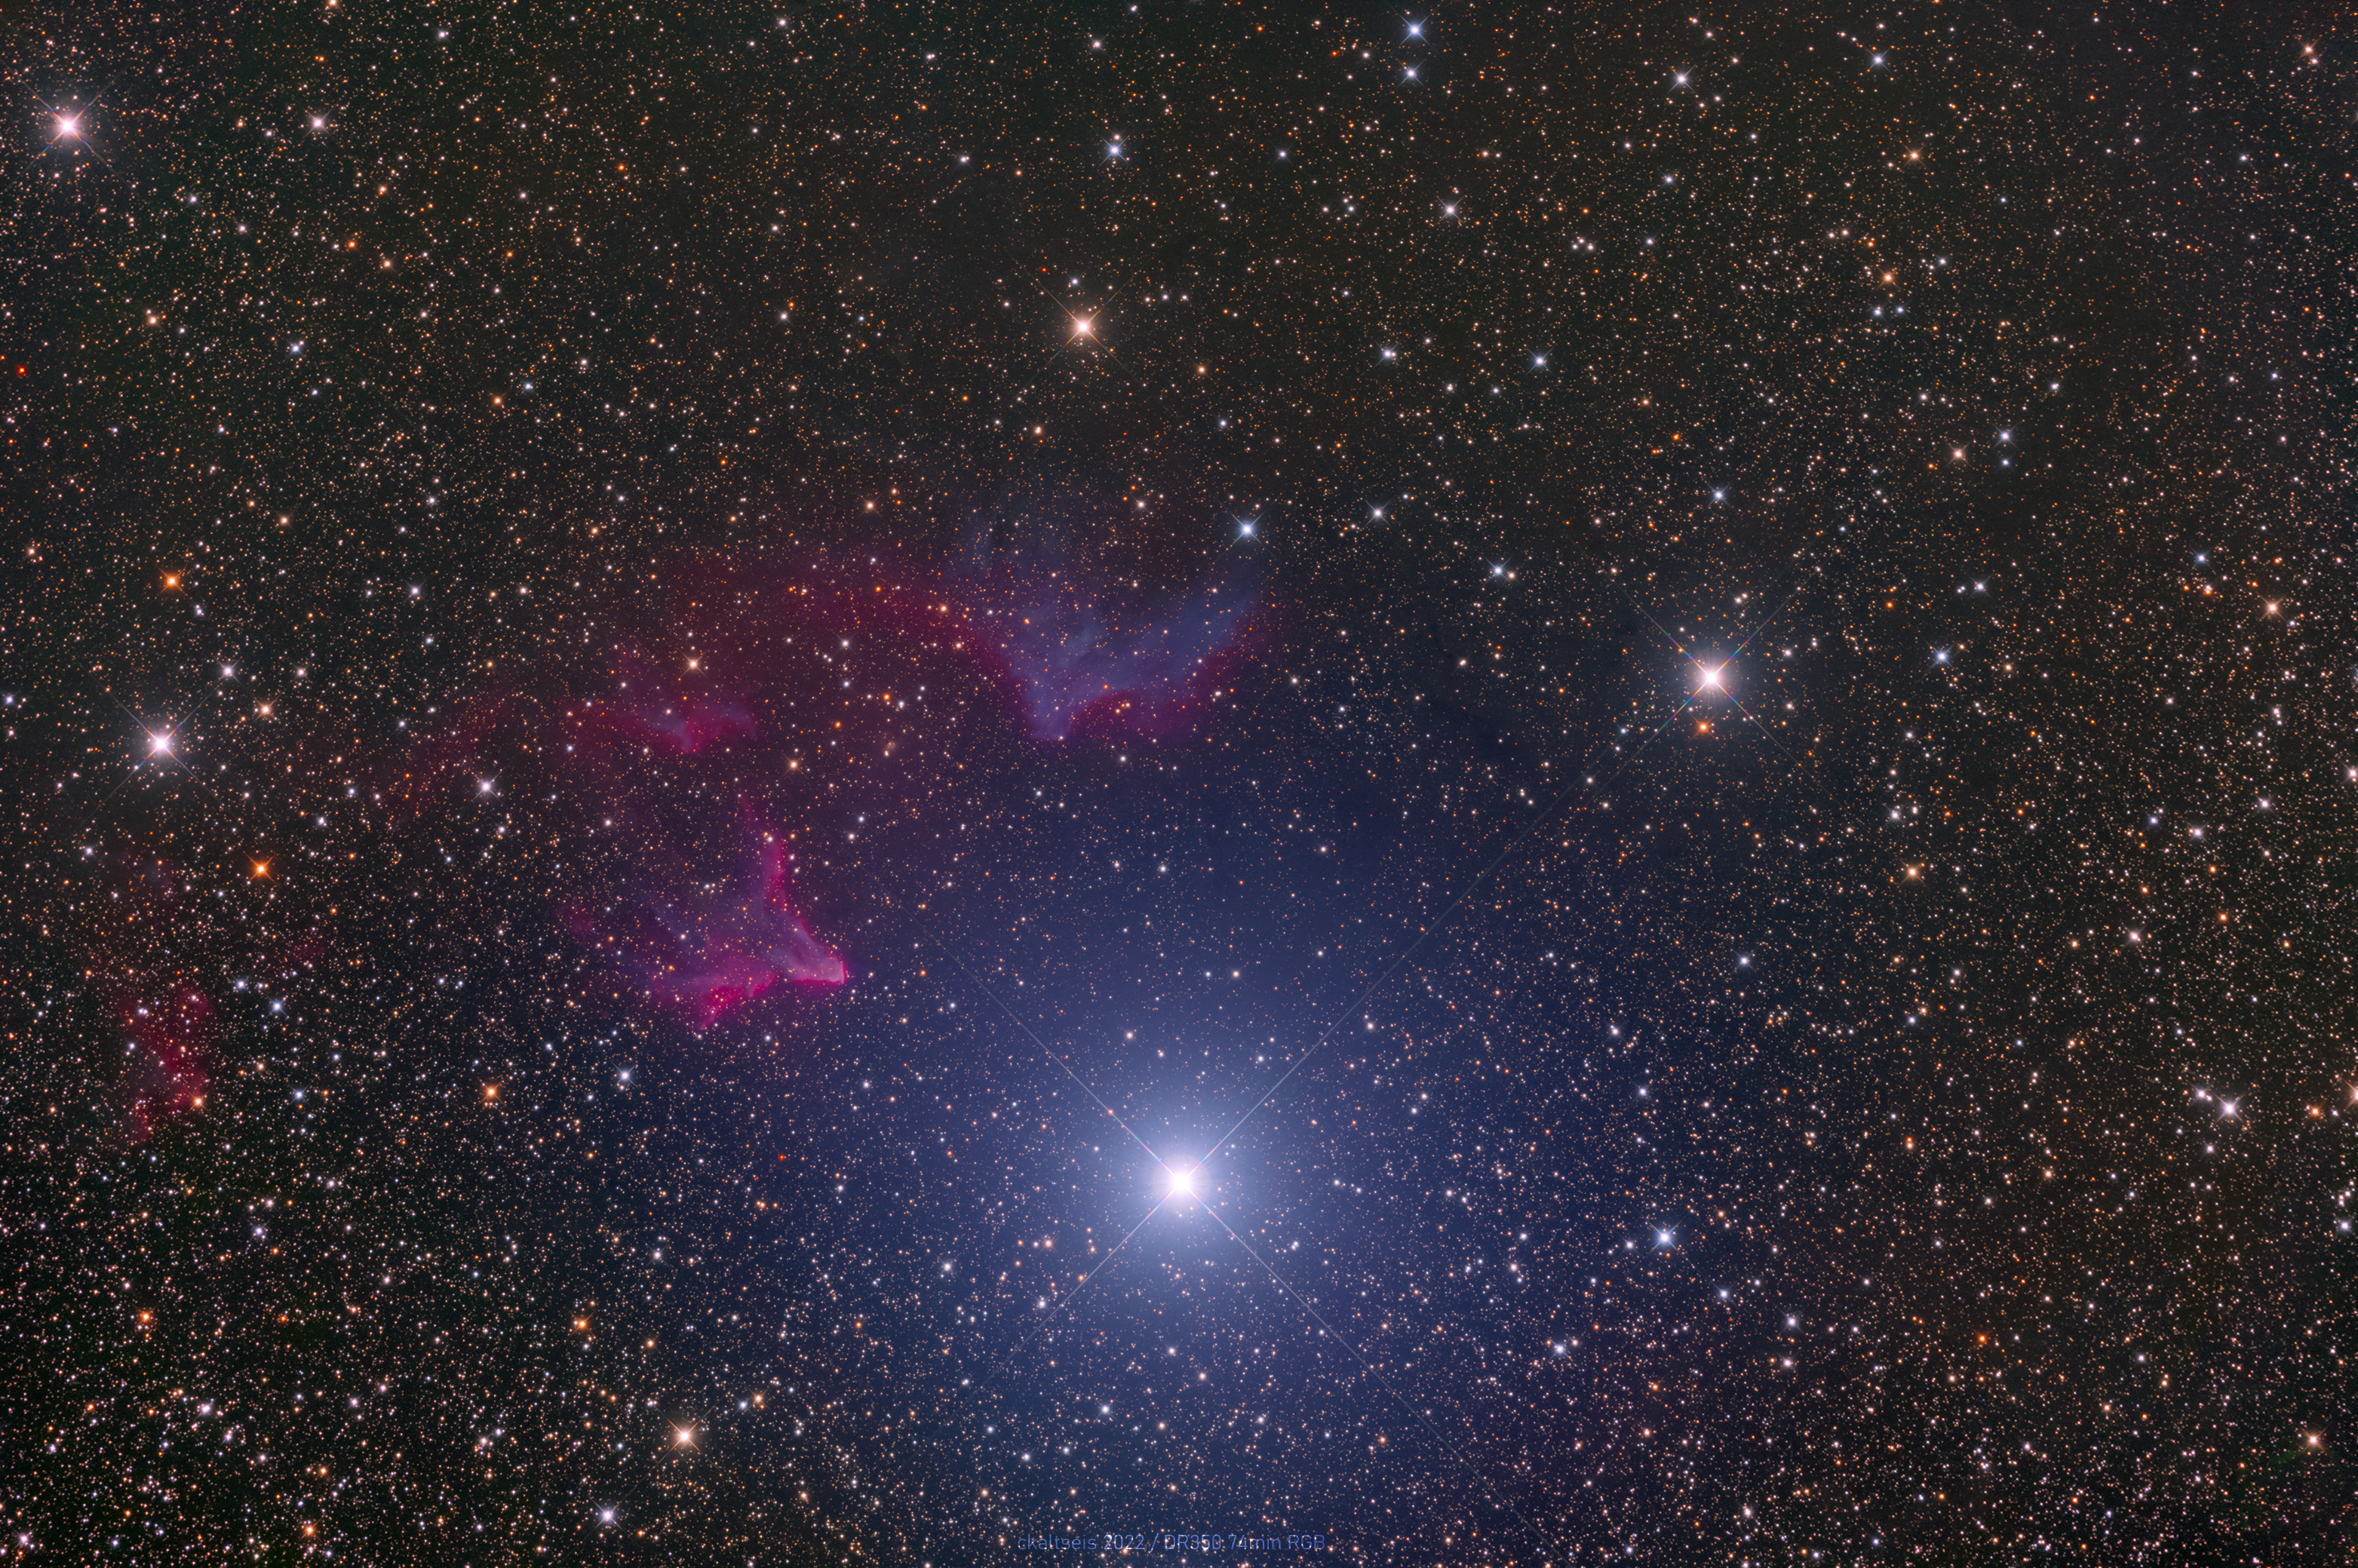
The image of IC59 and IC63: Here the conditions were good for red, just good for green, and for blue I unfortunately already had a lot of haze and ground fog. Exposures were only 60sec per single shot, with the QHY 600M in Bin2 (Gain 26).
The number of all exposures was well over 100, leaving 74min in RGB. The flats were taken with film, darks and bias for data reduction in PixInsight.
The result is very promising with the background of not ideal conditions! For ONLY RGB this is really good!
Software:
Data reduction, stacking: PixInsight
Image editing: Adobe Photoshop CC 2023 + APF-R
It is a top hardware, which needs absolute care with the adjustment, but rewards you with very good image results. And the system is absolutely remote capable!
A dream telescope? Yes – without a doubt!
